


- Introduction
- Maintenance
- Preparation
- Service specifications
- Diagnostics
- 2JZ-GE Engine
- 2JZ-GTE Engine
- 2JZ-GTE Turbocharging
- 2JZ-GE Emission control
- 2JZ-GTE Emission control
- 2JZ-GE SFI
- 2JZ-GTE SFI
- Cooling
- Lubrication
- Ignition system 2JZ-GE
- Ignition system 2JZ-GTE
- Starting system
- Charging system
- Clutch
- W58 manual transmission
- V160 manual transmission
- A340E 2JZ-GE automatic transmission
- A340E 2JZ-GTE automatic transmission
- Propeller shaft
- Suspension and axle
- Brake system
- Steering
- Supplemental restraint system
- Body electrical system
- Body
- Air conditioning system
- Install crankshaft timing pulley
- Align the pulley set key with the key groove of the pulley.

- Slide on the timing pulley facing the flange side inward. Do not scratch the sensor part of the crankshaft timing pulley.
- Align the pulley set key with the key groove of the pulley.
- Install idler pulley
- Apply adhesive to 2 or 3 threads of the pivot bolt.
Adhesive:
Part No. 08833-00080, THREE BOND 1344, LOCTITE 242 or equivalent
- Using a 10 mm hexagon wrench, install the plate washer and pulley with the pivot bolt.
Torque: 35 N·m (350 kgf·cm, 26 ft·lbf) - Check that the pulley bracket moves smoothly.
- Apply adhesive to 2 or 3 threads of the pivot bolt.
- Temporarily install timing belt The engine should be cold.
- Use the crankshaft pulley bolt to turn the crankshaft, and align the dot mark on the crankshaft timing pulley and the timing mark on the oil pump body.

- Remove any oil or water on the crankshaft timing pulley and idler pulley, and keep them clean.
- Install the timing belt on the crankshaft timing pulley and idler pulley. When re-using timing belt:
Align the matchmarks of the crankshaft timing pulley and timing belt, and install the belt with the arrow pointing in the direction of engine revolution.
- Use the crankshaft pulley bolt to turn the crankshaft, and align the dot mark on the crankshaft timing pulley and the timing mark on the oil pump body.
- Install timing belt guide
Install the guide, facing the cup side outward.
- Install No.1 timing belt cover
- Install the gasket to the timing belt cover.
- Install the timing belt cover with the 5 bolts.
Torque: 8.0 N·m (80 kgf·cm, 71 in.·lbf)
- Install crankshaft pulley
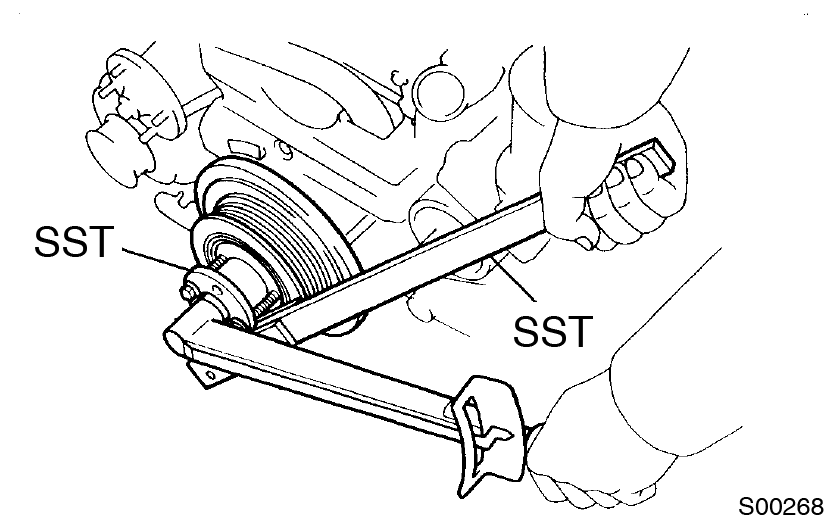
- Align the pulley set key with the key groove of the pulley, and slide on the pulley.
- Using SST, install the bolt.
SST 09213-70010, 09930-00021
Torque: 324 N⋅m (3,300 kgf⋅cm, 239 ft⋅lbf)
- A/T:
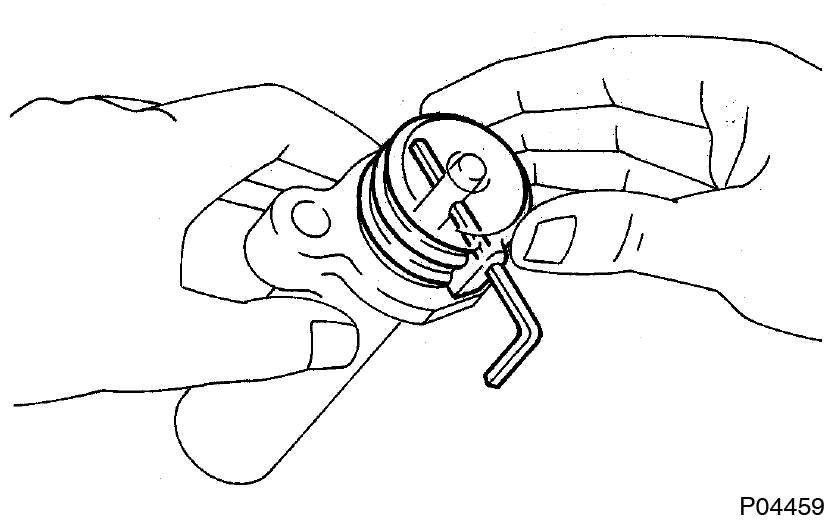
Connect oil cooler tubes - Install camshaft timing pulleys
- Align the camshaft knock pin with the groove of the pulley, and slide on the timing pulley.
- Temporarily install the timing pulley bolt.
- Using SST, tighten the pulley bolt.
SST 09960-10010 (09962-01000, 09963-01000)
Torque: 79 N⋅m (810 kgf⋅cm, 59 ft⋅lbf)
- Align the camshaft knock pin with the groove of the pulley, and slide on the timing pulley.
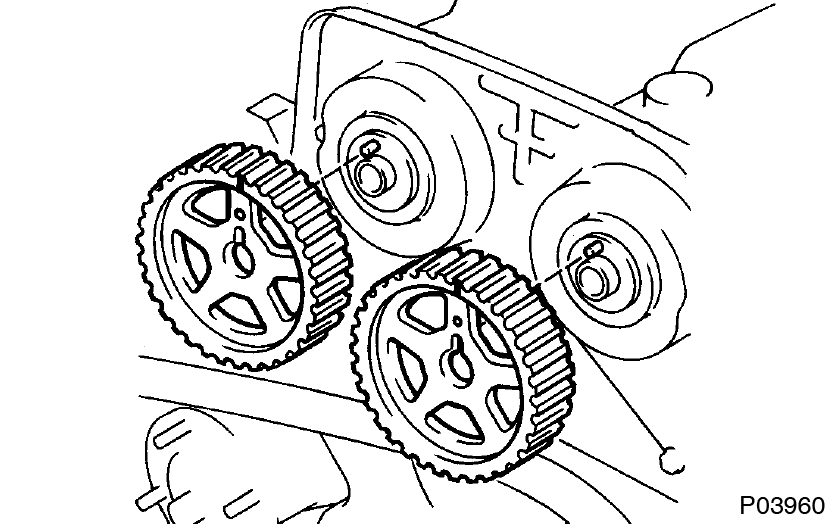
- Set No.1 cylinder to TDC/compression
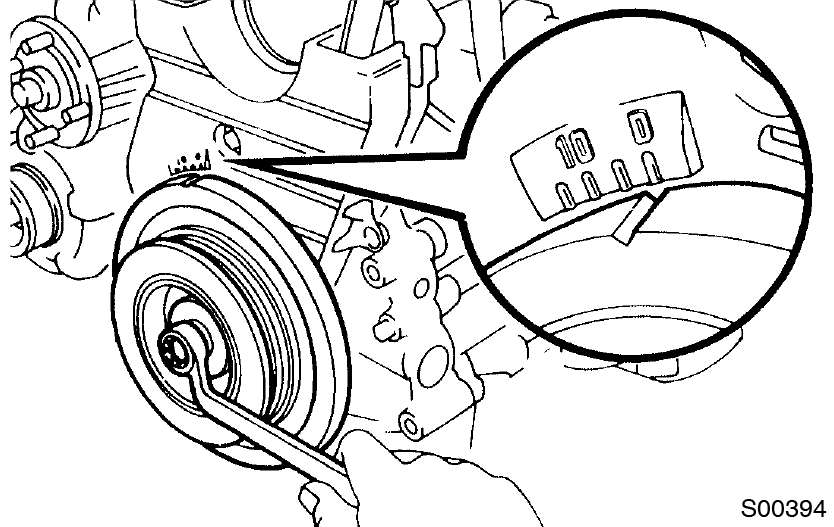
- Turn the crankshaft pulley, and align its groove with timing mark ”0” of the No.1 timing belt cover. Always turn the crankshaft clockwise.
- Using SST, align the timing marks of the camshaft timing pulleys and No.4 timing belt cover.
SST 09960-10010 (09962-01000, 09963-01000)
- Turn the crankshaft pulley, and align its groove with timing mark ”0” of the No.1 timing belt cover.
- Install timing belt When re-using timing belt:
Align the matchmarks of the timing belt and camshaft timing pulleys- Remove any oil or water on the camshaft timing pulley, and keep it clean.

- Install the timing belt, checking the tension between the crankshaft timing pulley and exhaust camshaft timing pulley.
- Remove any oil or water on the camshaft timing pulley, and keep it clean.
- Set timing belt tensioner
- Using a press, slowly press in the push rod using 981 - 9,807 N (100 - 1,000 kgf, 220 - 2,205 lbf) of force.
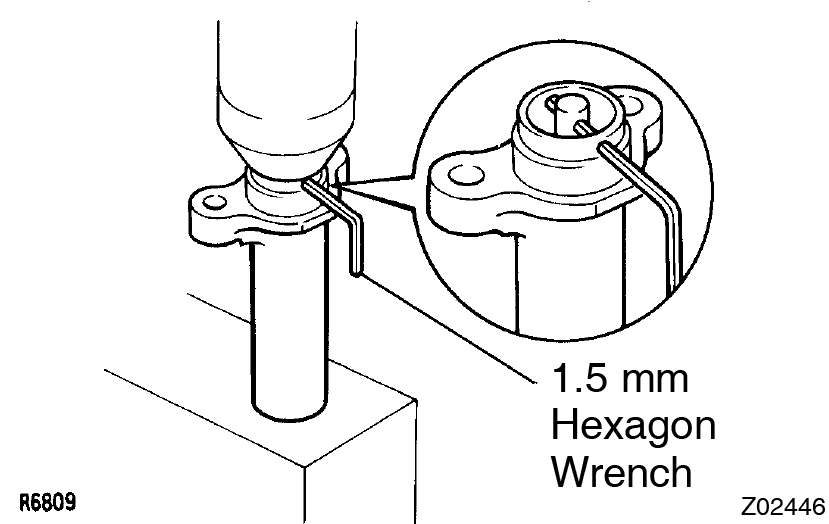
- Align the holes of the push rod and housing, pass a 1.5 mm hexagon wrench through the holes to keep the push rod retracted.
- Release the press.
- Install the dust boot onto the tensioner.
- Using a press, slowly press in the push rod using 981 - 9,807 N (100 - 1,000 kgf, 220 - 2,205 lbf) of force.
- Install timing belt tensioner
- Temporarily install the tensioner with the 2 bolts.

- Alternately tighten the 2 bolts.
Torque: 26 N⋅m (270 kgf⋅cm, 20 ft⋅lbf) - Remove the 1.5 mm hexagon wrench from the tensioner with pliers.
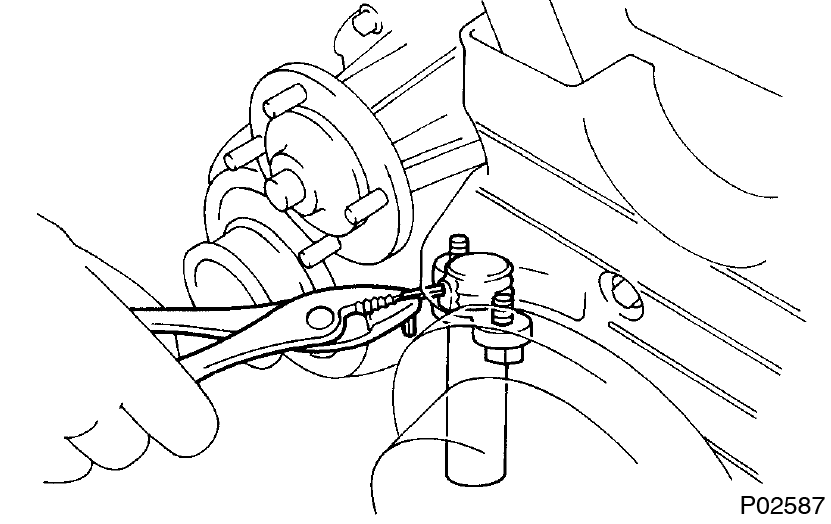
- Temporarily install the tensioner with the 2 bolts.
- Check valve timing
- Slowly turn the crankshaft pulley 2 revolutions from TDC to TDC. Always turn the crankshaft clockwise.
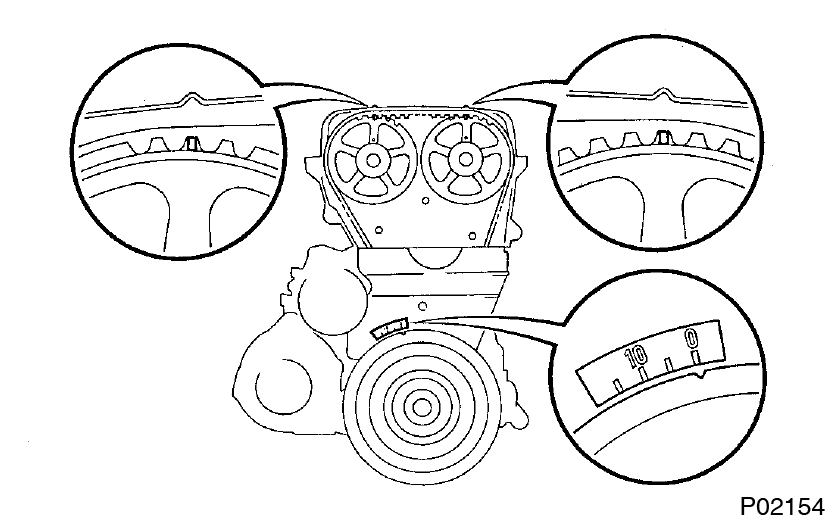
- Check that each pulley aligns with the timing marks as shown in the illustration.
If the marks do not align, remove the timing belt and reinstall it.
- Slowly turn the crankshaft pulley 2 revolutions from TDC to TDC.
- Install drive belt tensioner
Install the tensioner with the 3 bolts.
Torque: 21 N⋅m (210 kgf⋅cm, 15 ft⋅lbf)Be careful not to drop the bolts inside the timing belt cover.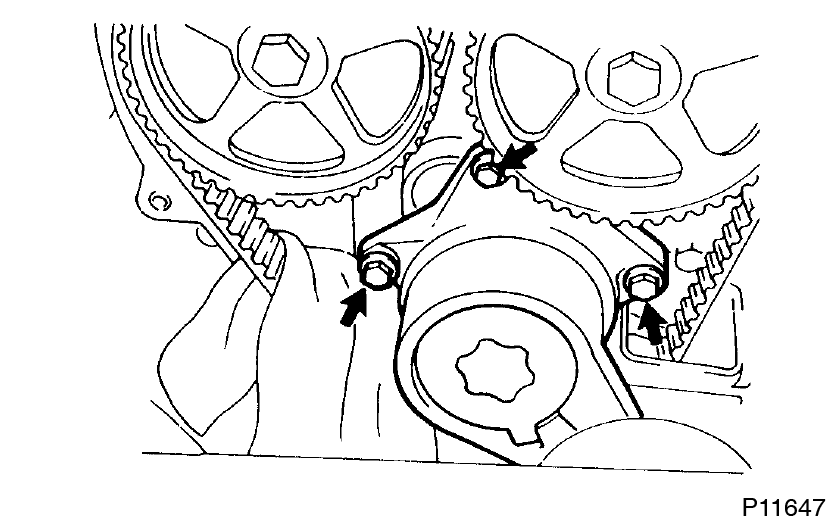
- Install No.2 timing belt cover
- Install No.3 timing belt cover
- Install PS pump front bracket and pump pulley
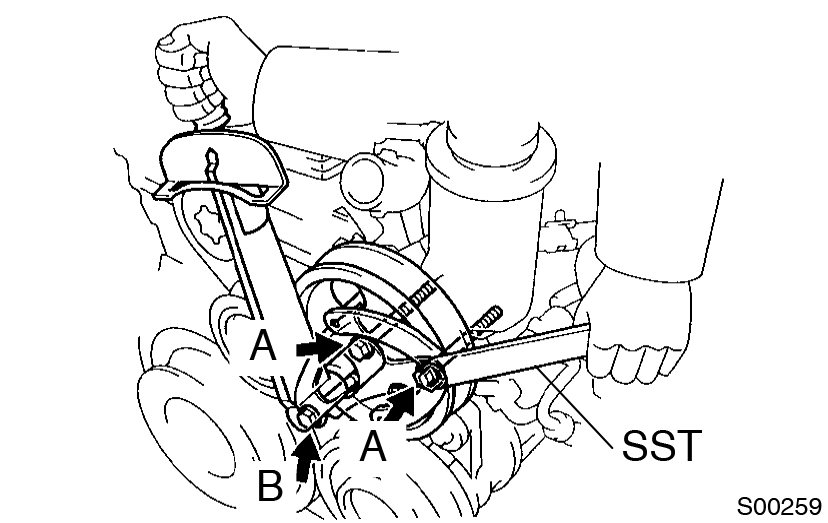
- Temporally install the pump front bracket with the 2 bolts (A).
- Install the plate washer and bolt (B), and tighten the 2 bolts (A).
Torque:
58 N·m (590 kgf·cm, 43 ft·lbf) for A
52 N·m (530 kgf·cm, 38 ft·lbf) for B - Temporarily install the pump pulley with the nut.
- Using SST, tighten the pulley nut.
SST 09960-10010 (09962-01000, 09963-01000)
Torque: 43 N·m (440 kgf·cm, 32 ft·lbf)
- Install water pump pulley, fan, fluid coupling assembly and drive belt (See page CO-11)
- Install radiator assembly (See page CO-28 )
- Road test
Check for abnormal noise, shock, slippage, correct shift points and smooth operation.
This guide is based on the book edition Toyota (RM502U, 1997)