


- Introduction
- Maintenance
- Preparation
- Service specifications
- Diagnostics
- 2JZ-GE Engine
- 2JZ-GTE Engine
- 2JZ-GTE Turbocharging
- 2JZ-GE Emission control
- 2JZ-GTE Emission control
- 2JZ-GE SFI
- 2JZ-GTE SFI
- Cooling
- Lubrication
- Ignition system 2JZ-GE
- Ignition system 2JZ-GTE
- Starting system
- Charging system
- Clutch
- W58 manual transmission
- V160 manual transmission
- A340E 2JZ-GE automatic transmission
- A340E 2JZ-GTE automatic transmission
- Propeller shaft
- Suspension and axle
- Brake system
- Steering
- Supplemental restraint system
- Body electrical system
- Body
- Air conditioning system
- Inspect timing belt If there are any defects, as shown in the illustrations, check the following points.
- Do not bend, twist or turn the timing belt inside out.
- Do not allow the timing belt to come into contact with oil, water or steam.
- Do not utilize timing belt tension when installing or removing the mount bolt of the camshaft timing pulley.
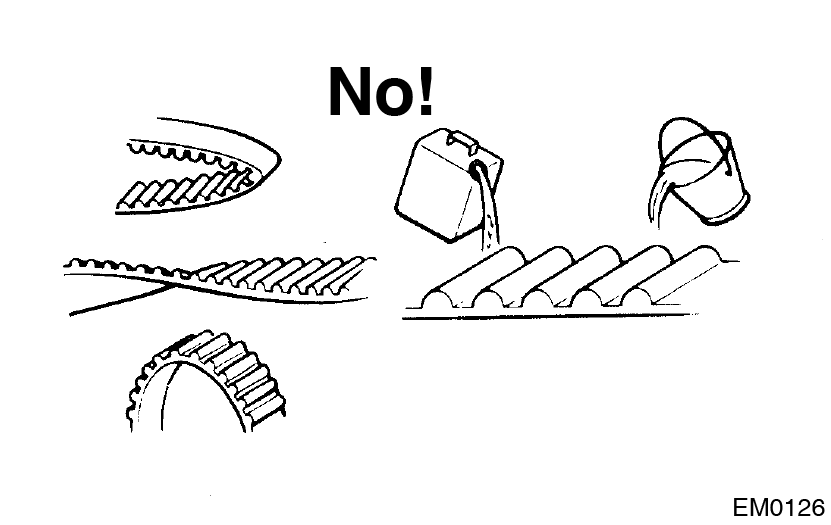
- Premature parting
- Check for proper installation.
- Check the timing cover gasket for damage and proper installation.
- If the belt teeth are cracked or damaged, check to see if either camshaft is locked.
- If there is noticeable wear or cracks on the belt face, check to see if there are nicks on the side of the idler pulley lock.
- If there is wear or damage on only one side of the belt, check the belt guide and the alignment of each pulley.
- If there is noticeable wear on the belt teeth, check timing cover for damage and check gasket has been installed correctly and for foreign material on the pulley teeth.
If necessary, replace the timing belt.
- Inspect idler pulley
- Visually check the seal portion of the idler pulley for oil leakage.
If leakage is found, replace the idler pulley.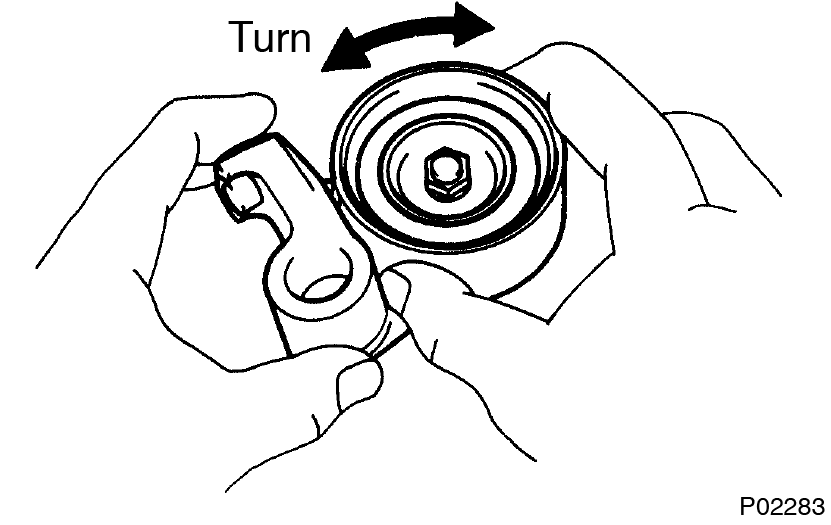
- Check the turning smoothness of the idler pulley.
If necessary, replace the idler pulley.
- Visually check the seal portion of the idler pulley for oil leakage.
- Inspect drive belt tensioner
Check the turning smoothness of the tensioner.
If necessary, replace the tensioner. - Inspect timing belt tensioner
- Visually check tensioner for oil leakage. If there is only the faintest trace of oil on the seal on the push rod side, the tensioner is all right.
If leakage is found, replace tensioner.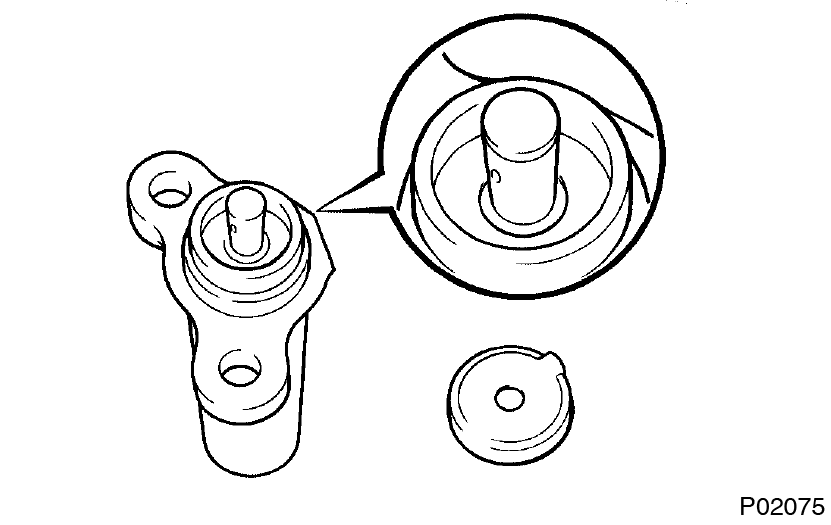
- Hold the tensioner with both hands and push the push rod strongly against the floor or wall to check that it doesn’t move.
If the push rod moves, replace the tensioner.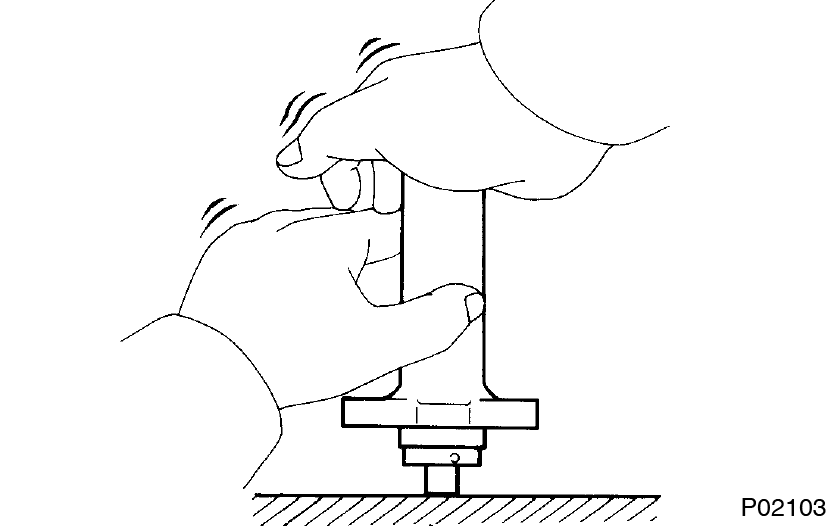
- Measure the protrusion of the push rod from the housing end.
Protrusion: 8.0-8.8 mm (0.315-0.346 in.)
If the protrusion is not as specified, replace the tensioner.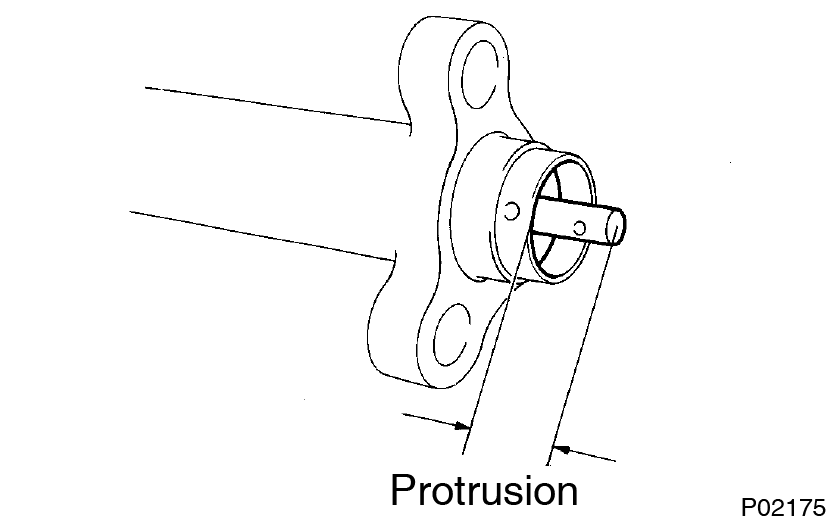
- Visually check tensioner for oil leakage.
This guide is based on the book edition Toyota (RM502U, 1997)