


- Introduction
- Maintenance
- Preparation
- Service specifications
- Diagnostics
- 2JZ-GE Engine
- 2JZ-GTE Engine
- 2JZ-GTE Turbocharging
- 2JZ-GE Emission control
- 2JZ-GTE Emission control
- 2JZ-GE SFI
- 2JZ-GTE SFI
- Cooling
- Lubrication
- Ignition system 2JZ-GE
- Ignition system 2JZ-GTE
- Starting system
- Charging system
- Clutch
- W58 manual transmission
- V160 manual transmission
- A340E 2JZ-GE automatic transmission
- A340E 2JZ-GTE automatic transmission
- Propeller shaft
- Suspension and axle
- Brake system
- Steering
- Supplemental restraint system
- Body electrical system
- Body
- Air conditioning system
- Check oil quality
 Check the oil for deterioration, entry of water, discoloring or thinning.
If oil quality is visibly poor, replace the oil.
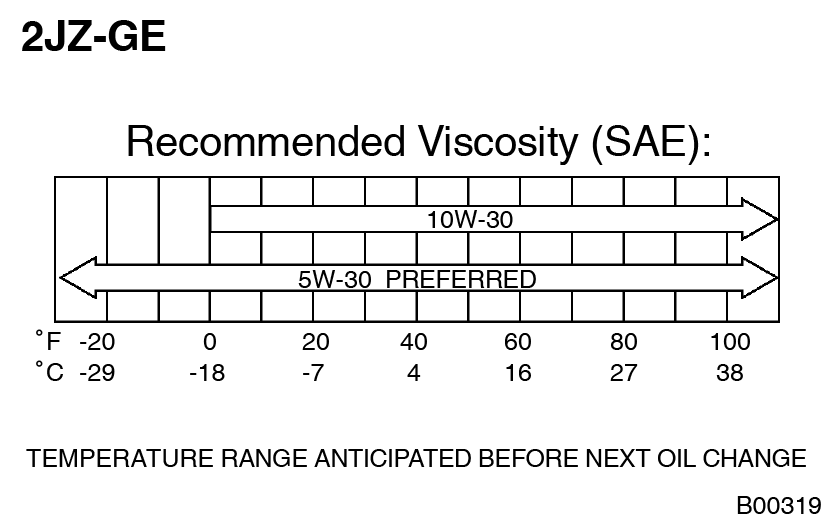
Oil grade (2JZ-GE):
API grade SH Energy-Conserving II or SJ, Energy-Conserving or ILSAC multigrade engine oil.
SAE 5W-30 is the best choice for your vehicle, for good fuel economy, and good starting in cold weather. Oil grade (2JZ-GTE):
API grade SH Energy-Conserving II or SJ, Energy-Conserving or ILSAC multigrade engine oil.
Recommended viscosity is as shown in the illustration. - Check engine oil level
 The oil level should be between the low level and full level marks on the dipstick.
If low, check for the leakage and add oil up to full level mark. - Remove engine under cover
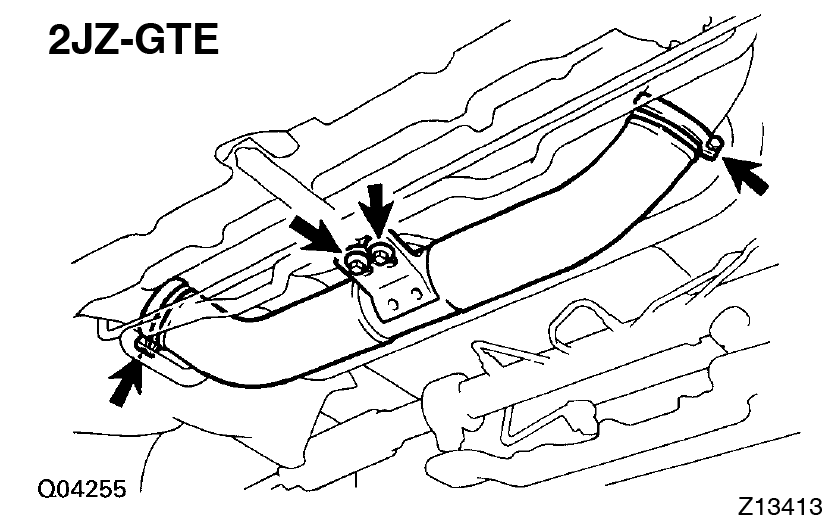
- 2JZ-GTE:
Remove No.2 air tube
Loosen the 2 hose clamps, and remove 2 bolts and air tube. - 2JZ-GTE M/T:
Remove drive belt tension damper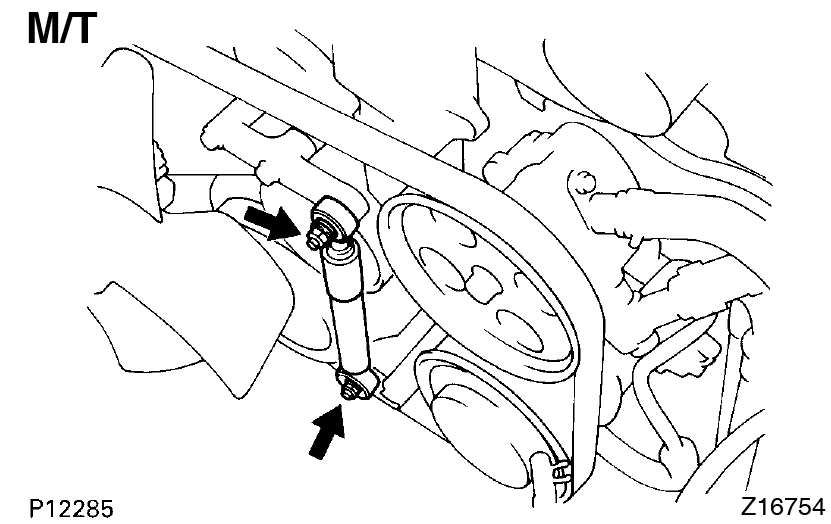 Remove the 2 nuts and tensioner damper.
 - Remove drive belt
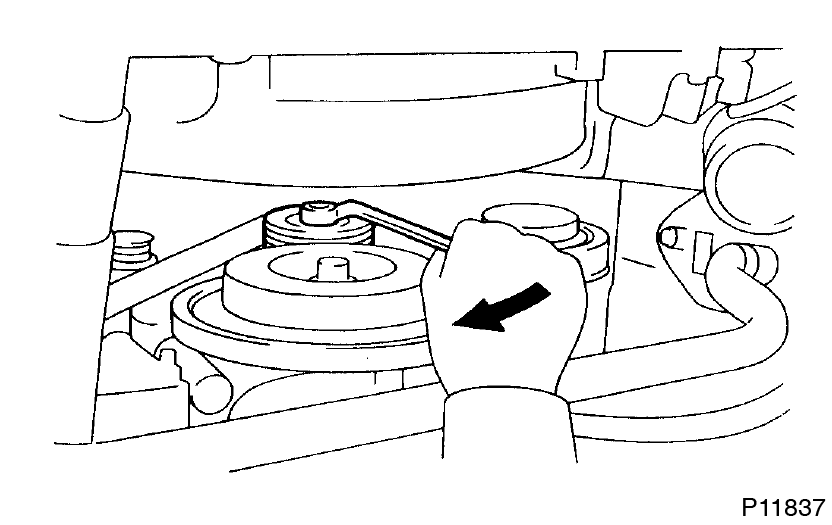 Loosen the drive belt tension by turning the drive belt tensioner clockwise, and remove the drive belt.
 - Disconnect A/C compressor from engine
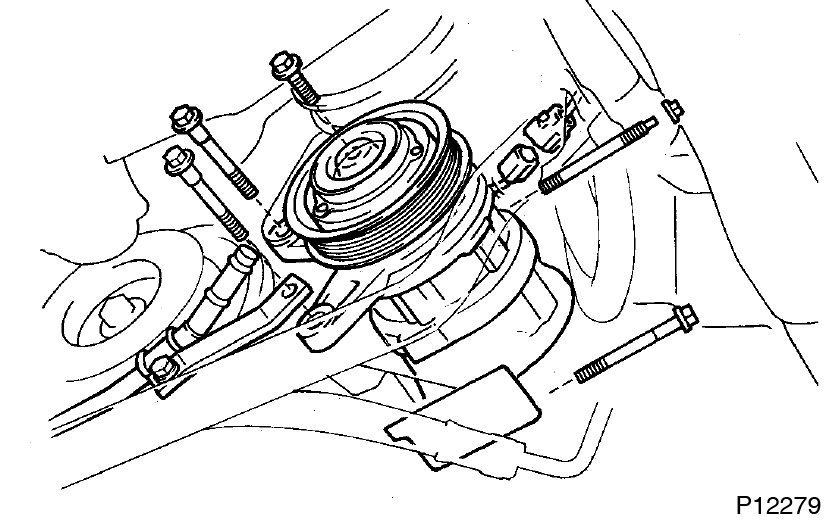
- Remove the 4 bolts and nut.
- Using a torx socket (E10), remove the stud bolt.
- Disconnect the compressor connector.
- Remove 4 bolts and pull the compressor downward.
- Remove oil pressure switch, and install oil pressure gauge
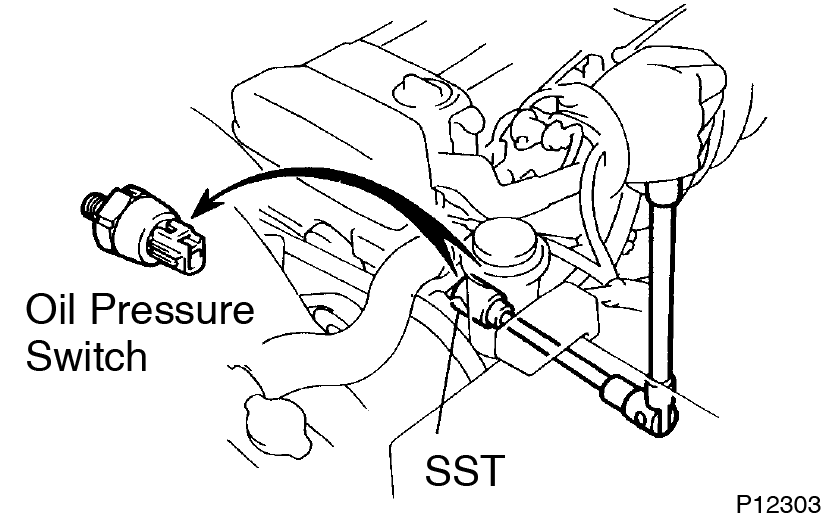
- Disconnect the oil pressure switch connector.
- Using SST, remove the oil pressure switch.
SST 09816-30010 - Install an oil pressure gauge.
- Reinstall A/C compressor
- Temporarily install the A/C compressor with the 4 bolts.
- Connect the compressor connector.
- Install the compressor with the stud bolts, 4 bolts and nut.
Torque:
Stud bolt: 26 N·m (265 kgf·cm, 19 ft·lbf)
Bolt and nut: 52 N·m (530 kgf·cm, 38 ft·lbf)
- Reinstall drive belt
Install the drive belt by turning the drive belt tensioner clockwise. - Warm up engine
Allow the engine to warm up to normal operating temperature. - Check oil pressure
 Oil pressure:
At idle
49 kPa (0.5 kgf/cm 2 , 7.1 psi) or more
At 3,000 rpm (2JZ-GE) or 4,000 rpm (2JZ-GTE)
324 - 579 kPa
(3.3 - 5.9 kgf/cm 2 , 47 - 84 psi) - Remove drive belt
- Disconnect A/C compressor from engine
- Remove oil pressure gauge, and reinstall oil pressure switch
- Remove the oil pressure gauge.
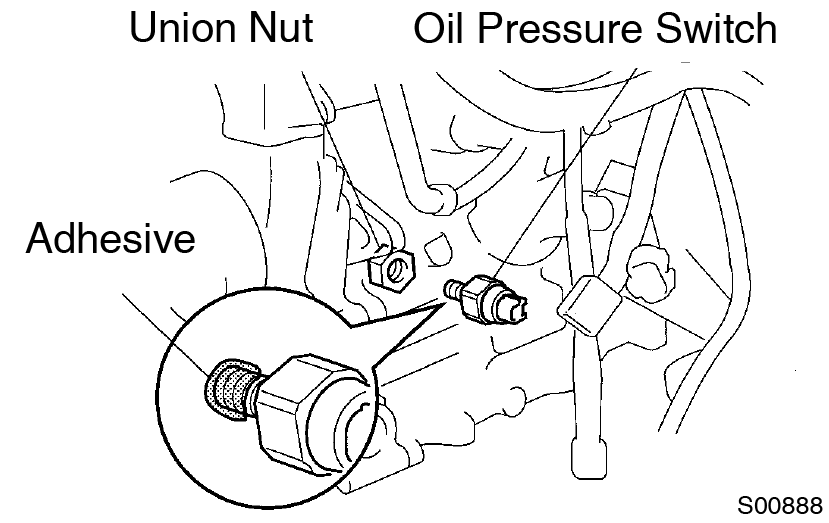
- Tighten the union nut.
Torque: 60 N·m (600 kgf·cm, 44 ft·lbf) - Apply adhesive to 2 or 3 thread of the oil pressure switch.
Adhesive:
Part No. 08833-00080, THREE BOND 1344, LOCKTITE 242 or equivalent - Using SST, install the oil pressure switch.
SST 09816-30010
Torque: 14 N·m (150 kgf·cm, 11 ft·lbf) - Connect the oil pressure switch connector.
- Reinstall A/C compressor
- Reinstall drive belt
- Start engine and check for reaks
- 2JZ-GTE M/T:
Install drive belt tensioner damper
Torque: 20 N·m (200 kgf·cm, 14 ft·lbf) - 2JZ-GTE:
Reinstall No.2 air tube - Reinstall engine under cover
This guide is based on the book edition Toyota (RM502U, 1997)